Sunday, November 13, 2011

Pinterest my newest addiction!


A few months ago, I read about a website called Pinterest on one of the blogs I follow. I decided to check it out and see what it was all about, well needless to say I was hooked from day one! Since joining Pinterest I've found some amazing new recipes that I've tried, made various things for around the house and even made a gift or two! Since finding Pinterest, I don't spend as much time in the kitchen, now atleast once every week or two I'm crafting something I found on my favorite website!

Now that life has slowed down a bit, I'm going to do my best to be better about updating my blog!! From here out though, you can expect to see things besides new recipes! I'm going to try to post things that I've tried from Pinterest!

Yesterday, my brother-in-law and his girlfriend, Kelly came over to spend the day. The boys were all about the football, while Kelly and I tackled a few Pinterest projects! Oh and do a complete make-over of my horrendously huge mantle! Sooo.....onto what we made!

Our first project, was making a moss letter! We picked up a 22 inch paper-mache letter and sheet moss from Joann's, everything else we had at home! This was the great step-by-step tutorial we used to create our letter.


Our next project was cutting the tops or bottoms off of wine bottles to make them into vases or to put candles under them! Kelly was kind enough to bring several different shaped and colored bottles that we could use, so we had a variety to choose from. (and practice on!) This was by far the most challenging project we did!! It was by trial and error that we finally perfected how to cut the glass and have a clean cut! Here's one of the bottles we cut the bottom off of:


And lastly we painted clear glass containers to put candles in!


*disclaimer: So sorry for the subpar great pictures, when I went to take pictures with my SLR the battery was dead, I had to settle for using my phone instead!
Follow Me on Pinterest

Wednesday, June 8, 2011

The perfect summertime cake!


A person dear to my heart told me about this cake, she raved about how wonderful it was and so simple to make. A few days after she told me about the cake, I was browsing through some of my grandmother's old recipes and came across the recipe she'd told me about! My grandmother had marked the page, I knew then I had to give this cake a try!!!!

Let me tell you, wonderful is an understatement! This cake is aaammaaazzing! It light and moist, with just the right amount of sweetness and tartness!

The recipe my friend described to me was a tad bit different than the one I'd found in the book, so I made mine a little different than both....using different parts of each recipe. One called for lemon zest, which I thought would be a nice addition so I added that! Then they both said to use lemon juice for the glaze, I just used some of the remaining apricot nectar. Although it probably would've made sense to use the lemon juice since I zested the lemon, but I wanted to try something different. I've made a glaze several times with lemon juice. With this cake, I'm not so sure that there is a noticeable difference between using the lemon juice and apricot nectar. With all of that being said, without a doubt I'll be making this cake in the future!


Apricot Nectar Cake

1 package yellow cake mix
zest of 1 lemon
1/3 cup white sugar
1/2 vegetable oil
1 cup apricot nectar
4 eggs

Grease and flour a 10 inch tube pan. Combine cake mix with sugar, cooking oil, lemon zest and apricot nectar. Beat for two minutes with mixer at medium speed. Add eggs one at a time, beating for 30 seconds after each addition. Pour batter into angel food cake pan that has been greased. Bake at 325 for 55 to 60 minutes. Let cake cool for about 10 minutes, turn out onto plate.

Glaze
1 cup powdered sugar
2 Tbs lemon juice (or apricot nectar)

Mix together, stirring until sugar throughly dissolved. Punch holes in top of cake, pour glaze over warm cake.

& Enjoy!

Saturday, September 18, 2010

Ranch Oyster Crackers


I was searching for a simple and quick snack recipe, I came across these. I’ve made a different version of these in the past, with just the dry ranch seasoning mix and oil. However, I didn’t care for them, they were just missing something. I figured I’d give this recipe a shot but alter it just a tad. With the few alterations, they turned out great! They’re quick and easy to make, you have no excuse not to try them!

Sometimes I don’t have time to make anything elaborate to take to a gathering. The next time I need to take something to a football party, I will be taking these!! You can’t go wrong with an inexpensive easy recipe!!

Ranch Oyster Crackers
½ cup of vegetable oil
1 oz packet of Hidden Valley Ranch dressing mix
½ tsp dried dill
¼ tsp garlic powder (you can up this to ½ tsp if you like a stronger garlic flavor)
12 oz package of oyster crackers

Directions:
Preheat oven to 275
In small bowl, whisk together oil, dill, garlic powder and dressing mix. Spread out oyster crackers in a large baking sheet. Pour mixture over crackers, stirring until crackers are well coated. Bake in preheated oven at 275 for 15-20 minutes; stirring at about 10 minutes into the baking time.


If you’d like to have a little variety, add some pretzels, gold fish, unsalted peanuts or bagel chips to the mix!

Thursday, September 16, 2010

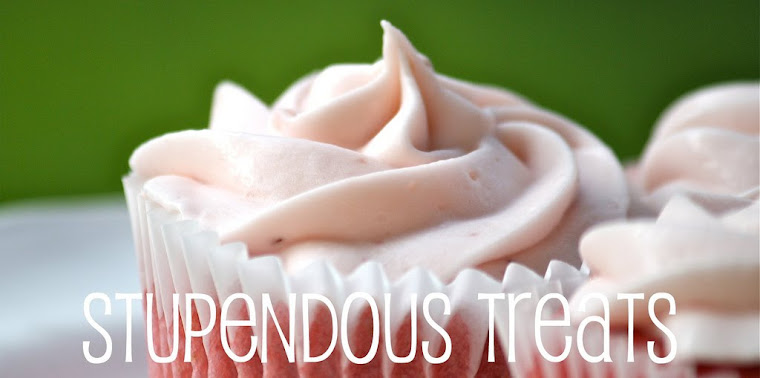
Summertime strawberry cupcakes!


These cupcakes are in the top five of my all time favorites of all the desserts I've ever made! I know, I know you're thinking but you never bake because you don't post much!?! So maybe that's a little accurate, as of the past year I haven't baked as much because of my hectic school schedule. However, on average I try atleast two new dessert recipes a month, I just don't get around to blogging about them. This recipe though, could not be skipped! I had to pass along this wonderful recipe to the world!

If you're looking for a very strawberrieeee cake, (as my husband put it) then this is the cupcake for you! These are very moist cupcakes, the strawberry cream cheese frosting adds the perfect touch to make them a yummy little package!

The only draw back to making this recipe is the cost, the frozen strawberries in syrup and the extract aren't cheap. The first time I made these, I used fresh strawberries. I just cut them up and added sugar to them, then let them sit overnight to form a syrup. When strawberries are in season and on sale, that would be the perfect time to make these!

Oh and lastly, well most importantly, I'd like to mention why I made these cupcakes! My grandmother turned 98 on September 9th. She requested cupcakes with pink frosting! Knowing that strawberries are one of her favorite fruits, I knew instantly these were the cupcakes to make for her! They didn't let me down, she absolutely loved them! Not only did she polish off one, but she also had a second and would have taken a third but my mom didn't think that was such a great idea.

To sum up these cupcakes in two word, simply scrumptious! If you like strawberries, you must try this recipe!!

Strawberry cupcakes with strawberry cream cheese frosting
1 (18.25-ounce) box white cake mix
1 (3-ounce) box strawberry-flavored instant gelatin
1 (15-ounce) package frozen strawberries in syrup, thawed and pureed
4 large eggs
1/2 cup vegetable oil
1/4 cup water

Strawberry Cream Cheese Frosting
1/4 cup butter, softened
1 (8-ounce) package cream cheese, softened
1/4 thawed and pureed strawberries in syrup
1/2 teaspoon strawberry extract
7 cups confectioners’ sugar
Freshly sliced strawberries, for garnish, optional

Directions
Preheat oven to 350 degrees F.

In a large bowl, combine cake mix and gelatin. Add pureed strawberries, eggs, oil, and water; beat at low speed for about 15-30 seconds to get ingredients incorporated, then beat at medium speed for two minutes. Pour into cupcake liners, and bake for 20-24 minutes, or until a wooden pick inserted in the center comes out clean.

Let cool completely on wire racks before frosting.

For the frosting:
In a large bowl, beat butter and cream cheese at medium speed with an electric mixer until creamy. Beat in 1/4 cup of the strawberry puree and the strawberry extract. Gradually add confectioners’ sugar, beating until smooth.


Yields about 2 1/2 dozen cupcakes.

Adapted from Paula Deen Recipes

Wednesday, August 18, 2010

Mexican Deviled Eggs


When you need something to take to a gathering but don't have much time or money, this is it!! These deviled eggs are so tasty, my husband will no longer eat the deviled eggs that I use to make! I've taken these to several gatherings and every time they're gone quickly! I learned the hard way to save myself a couple so I atleast get one or two!

There is only one adaption I've made to the original recipe I have, that is to add more salsa! I always add about a tablespoon or two more than it calls for.

Also, I use Mama G's Salsa in a Snap! I think it makes the eggs that much tastier! (When making my salsa, I don't leave the tomatoes diced as her directions say, I put mine into the food processor to chop them up a little bit)

TIP: When peeling your hard boiled eggs: roll them across the counter to get the shell cracked into small pieces it will then just peel off all in one piece!


Mexican Deviled Eggs
12 hard boiled eggs
1/2 cup mayonnaise
1/4 cup salsa
1/4 cup finely grated shredded monterey pepper jack cheese
2 tablespoons finely chipped cilantro
Salt & Pepper to taste

Mash up the yolks using a fork. Combine yolks and ingredients together in a bowl, then fill egg whites with mixture. Use a cilantro leaf to garnish or chopped chives


If you'd like to purchase Mama G's Salsa in a Snap you can order it here: http://mamagcreations.com/index.html

Orange Marmalade Cookies


I've got quite a few recipes to post that I've made in the past few months...but first and the most recent I made are the orange marmalade cookies. When I came across this recipe on foodgawker, I knew I had to make them for my grandmother! It reminds me much of when she use to make candied orange peels, but in a cookie form! She has always loved orange marmalade so I knew she would love these!

These cookies are soft, sweet, orangey and slightly tangy! I can't eat one without having a glass of milk! I did deviate from the recipe a bit. The original recipe called for fresh squeezed orange juice. I used orange juice I already had in the fridge because the orange I had didn't quite given me enough. Instead of mixing what I had from the orange, I just used all of the Minute Maid orange juice I had.

Something I wanted to mention that I love about these cookies is that the are not greasy! When I make cookies, I always take them out of the oven and put them onto a paper towel on the counter to cool. Typically cookies leave a grease stain on the towel, these did not!

One thing I will to warn you about, is be sure you chill the cookies for atleast an hour!! If you don't they spread to thin and end up a little chewy. I was in a hurry, the first batch I made only was refrigerated about 20 minutes, needless to say that was not nearly enough time. After letting it sit in the fridge for about an hour, I tried another batch and they came out perfectly!

Lastly, I think I will do next time is make the icing a tad bit thinner maybe by adding some milk. This way I can just dip top of the cookies into the icing letting it just lightly coat the top of the cookies. The combination of the icing and cookies are very sweet, so I think with just the light layer of icing would make them perfect!


Orange Marmalade Cookies topped with Orange Icing
Yields about 3 dozen cookies

Cookie Dough
1/2 cup butter (softened)
1 cup sugar
2 large eggs
1 cups Orange marmalade (I used Smuckers)
3 cups AP flour
1/2 teaspoon baking soda
1/2 teaspoon sea salt

Orange Icing
Zest from 1 orange
Zest from 1/2 of a Lemon
1/4 cup fresh squeezed orange juice
1 teaspoon fresh squeezed lemon juice
3 tablespoon butter (melted)
1/8 teaspoon salt
3 cups confectioners’ sugar

1. Cream together butter and sugar. Add the eggs and orange marmalade and mix until thoroughly combined.

2. In another bowl, sift together the flour, salt and baking soda. With the mixer running, slowly add the flour mixture to the creamed mixture until blended. Cover the bowl and refrigerate for atleast an hour!

3. While the dough chills, make the icing. Combine citrus zests, juices, melted butter and salt in a bowl. Add in confectioners’ sugar until well combined and smooth. Cover until ready to frost the cookies.

4. Preheat oven to 300° F. Drop by spoonfuls on greased cookie sheet; do not crowd the cookies as the batter will spread a little bit during baking. Bake for about 20 minutes or until cookies are light brown. Remove from oven and put onto paper towels or wire rack.

5. Let the cookies cool completely before icing them with spatula.


Adapted from Neiman Marcus Taste and White on Rice Couple

Monday, January 11, 2010


Well I'm a bit late posting this one, but I still believe better late
than never! Right?!

Each year my mom and I get together for our annual "Bake Day" at my
house. We attempt new things and then we always do our old favorites
that everybody loves! For Christmas gifts to friends and family we
give them a tin full of sweet goodies! Everybody always seems to love
it, not to mention many now expect it each year!


I'm going to break the recipes up into several posts.

First and foremost, by far my favorite!


My mom has been making Toffee for years, it's something you'll always find in our Christmas candy tins! I do have to admit though, I don't have the patience to make Toffee! Standing at the stove stirring for what seems like forever just isn't for me! Mom on the other hand is patient, she makes several batches each year! Despite the amount of patience needed for making the Toffee it is well worth it!

Toffee

1 lb butter
2 cups sugar
1/4 cup of water
1 cup chopped pecans
1 cup milk chocolate chips

1. Spread pecans evenly over a well greased jelly roll pan. Saving some to sprinkle on top of the melted chocolate.

2. Add butter, sugar and water to a 4 quart sauce pan. Boil on high to 300 degrees on a candy thermometer. STIRRING CONSTANTLY!

3. Pour mixture over pecans in jelly roll pan. Let it sit for about 2-3 minutes. Sprinkle the chocolate chips on top of the toffee mixture, spreading after they melt. Sprinkle remaining pecans on top of the chocolate.

4. Set aside to cool. When toffee has harden break into pieces.